Sustainable Kitchen is a positive, practical handbook on how to shop, cook and eat in an ecologically sustainable way. Founders of the Sustainable Food Story, Abi Glencross and Sadhbh Moore, have put together tips and step-by-step projects on how to adapt your kitchen habits to a more eco-friendly way of life. Whether you are unsure about the best places to shop, what to do with your leftover lemons or how best to clean your kitchen without impacting the environment, Sustainable Kitchen is the complete guide to changing the way you think about food and the kitchen, in a way that is healthier for you and healthier for the planet. Having a sustainable approach to your kitchen will help you save money, connect to your community and produce better food, all whilst being kind to the planet. With small changes to make those choices easier, and a few recipes along the way to help battle food waste, here are several achievable ways to start making a difference.
- Sustainable Kitchen: projects, tips and advice to shop, cook and eat in a more eco-conscious way, by Sadhbh Moore and Abi Glencross. Photography by Maria Bell. White Lion Publishing, $29.99.
Beetroot and goat's cheese tart
This tart is our famous My Million Pound Menu dish, where we explained to the judges about regenerative farming. We used heritage grains, vegetables and dairy to tell the story of holistic mixed farming and how plants and animals interact in a sustainable food system. Aside from the environmental inclination, this tart is both delicious and easy to make
Ingredients
400g beetroot, cut into wedges
3 tbsp oil of choice
small bunch of thyme, leaves picked
1 tbsp wholemeal flour, for dusting
1 quantity of shortcrust Pastry (see below), chilled
5 medium eggs
300ml double cream
150g goat's cheese
sea salt and ground black pepper
Method
1. Preheat the oven to 200C. In a roasting tin, toss the beetroot in the oil with the thyme and a pinch of salt and pepper. Roast in the oven for 30 minutes until tender and slightly browned.
2. Lightly dust a work surface and rolling pin with flour and roll out the pastry. Roll up the pastry on the rolling pin and gently unroll it into a 23cm tart tin, pressing down the into the corners. Trim the pastry, making sure you still leave some hanging over the edges. Transfer to the fridge to chill for 20 minutes.

3. Cut a section of greaseproof paper larger than the tin and press it into the tart. Fill the tart with baking beans (can be substituted for rice or dried beans) and bake for 10-20 minutes until the base has dried.
4. Whisk the eggs and cream together in a bowl and add a hearty pinch of salt and pepper.
5. Remove the greaseproof paper and baking beans from the tart case and lightly brush some of the egg mixture over the inside of the tart. Bake for five more minutes until the egg mixture has set the pastry. Remove the tart case from the oven and trim the edges of the pastry down to the tart tin.
6. Arrange the roasted beetroot evenly in the tart and pour the rest of the egg mixture over the top, not quite up to the rim of the pastry. Crumble the goat's cheese evenly on top. Bake for 30-40 minutes until golden and the egg mixture doesn't wobble when shaken anymore. Serve warm or at room temperature.
Makes 1 x deep 23cm tart.
Shortcrust pastry
Ingredients
300g wholemeal flour (or flour of choice), chilled
150g vegan block (or butter), chilled and diced
1-2 tbsp ice-cold water
fine sea salt
Method
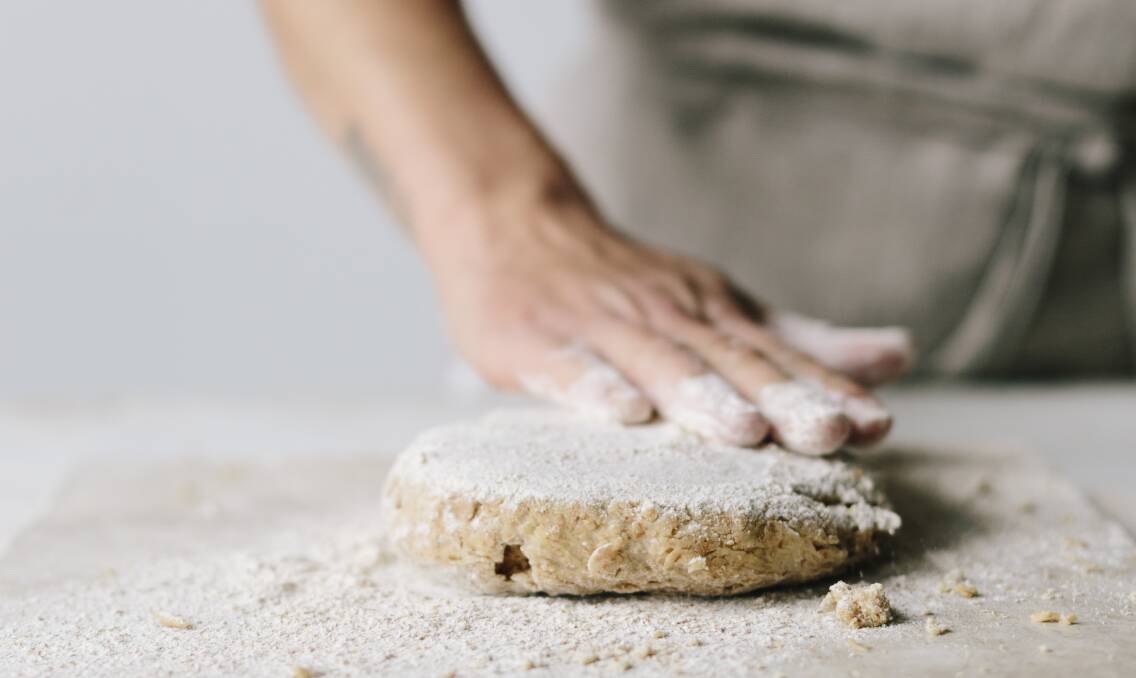
1. Place the flour in a bowl, sprinkle in a pinch of salt and mix through evenly. Add the block (or butter) and rub into the flour using your fingertips to keep the mixture cool. Carry on until it resembles fine breadcrumbs. Alternatively, you can use a food processor, pulsing gently so it doesn't get too hot.
2. Bring the mixture together into a firm dough. Start by adding 1 tablespoon of the water. If the dough is very crumbly, add the second tablespoon to help it along. Turn out onto a work surface to bring it together, but be careful not to knead it as this encourages gluten to form and can make the pastry tough.
3. Flatten the pastry into a round disc and wrap in a beeswax wrap or alternative. Place in the fridge and leave to chill for 30-60 minutes before using or freezing. The chilling process allows the gluten to relax and prevents the pastry from shrinking too much when it cooks.
Makes enough for a 23cm tart case.
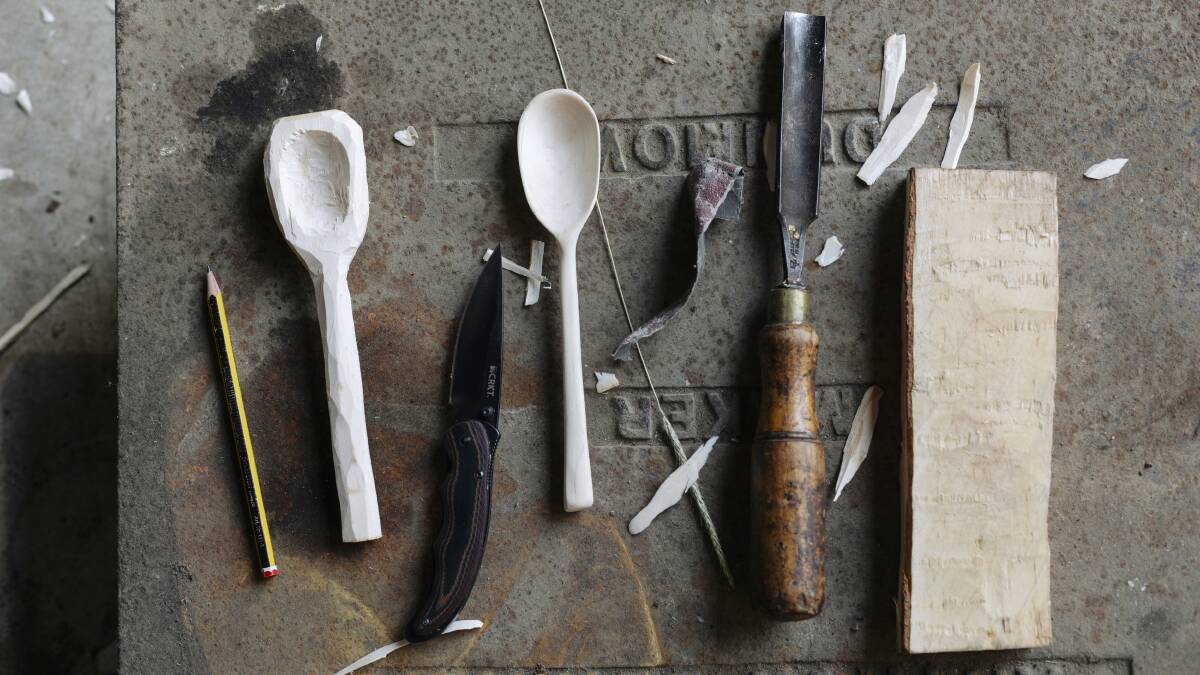
Make Your Own: Whittled porridge spoon
This might not be the quickest way to furnish a kitchen, but is it satisfying, low impact and impressive!
Materials
15 x 5cm piece of straight green wood (a fresh branch from a tree, or one that has been cut recently so has not had time to dry out. Alternatively, you can buy a "blank".)
sharp carving knife
hook knife (or a rounded gouge), (optional)
pencil or marker
80, 120, 220 and 400 grit sandpaper
linseed oil (or any cooking oil)
Method
1. Firmly holding the piece of wood in one hand or a vice, put your thumb against the back of your carving knife and place the blade 1cm or so down the branch, against the bark and facing away from you.
2. Push firmly with your thumb, chipping off the bark and a chip of wood just below it. Repeat, rotating the branch, until you have removed all of the bark.
3. With a pencil or marker, draw the shape of the spoon you want to carve on to the wood - this silhouette will work as a guide for the rest of your carving. It's best to start with a big and chunky spoon. Refinement comes after some practice.
4. Now repeat the chipping movement, whittling little chips of wood from the blank you've produced, and aiming to carve out the shape of the spoon you've drawn on. This may take many hours and may make your thumb feel a bit sore, or you may have strong hands and find it quite easy.
5. When it comes to carving out the bowl of the spoon, you may want to switch to a hook knife or rounded gouge. It's important not to dig too deep, as you'll carve from the back too, and meet in the middle. You need to keep the wood thick enough so as not to end up with a weak, too thin spoon.
6. When you're finished and happy with the shape of your spoon, however crude, you need to start sanding. Begin with the 80-grit sandpaper and work your way up to the finest grit to get the wood nice and smooth.
7. Rub with oil and leave to dry out slowly, not too close to a heat source as it may crack.
Makes 1 spoon.
Make Your Own: Bowl Covers

Another cover story. Many bread bakers will have learnt to cover bread dough with a clean, damp tea towel, to avoid it going crusty as it rises at room temperature. Making a simple fitted bowl cover means you'll never have to use a clean tea towel, or a stained or torn old one and wonder if it really is clean enough to be in contact with food.
You could use a beeswax cover, but having a plain fabric one means it can be kept moist and you can shove it in the washing machine. A fitted cover avoids having a trailing damp tea towel hanging off your bowl and the risk of the cloth falling into the bread.
Materials
bowl to measure around
fabric for the cover
length of 1cm thick elastic band, measuring at least the circumference of the bowl
safety pins and pins
needle and thread
Method
1. Start by drawing around the bowl you want to cover. Draw another circle around the outline that is 4cm wider.
2. Cut around the wider outline.
3. Pin or tack a 2cm hem all the way around the edge of the circle of fabric, leaving a gap at one side that is large enough to fit your elastic through the hem. This will pucker, because you're folding a larger circumference onto a smaller circumference, but that's OK. Just try to spread the puckers, or pleats, out evenly. Sew the hem in place.
4. Hook the end of the length of elastic with a safety pin. Use the closed safety pin to thread the elastic through the hem and tie or sew the two ends of the elastic where they meet, so that it pulls the hem together and starts to resemble a shower cap.
5. Place over the bowl to check it fits snuggly and you're all set!
Tip: You could use elastic from decommissioned pyjama bottoms - we try to save ours, balled up in the sewing kit, ready to upcycle for projects like this.
Makes 1 cover.
Mushroom and tofu burgers
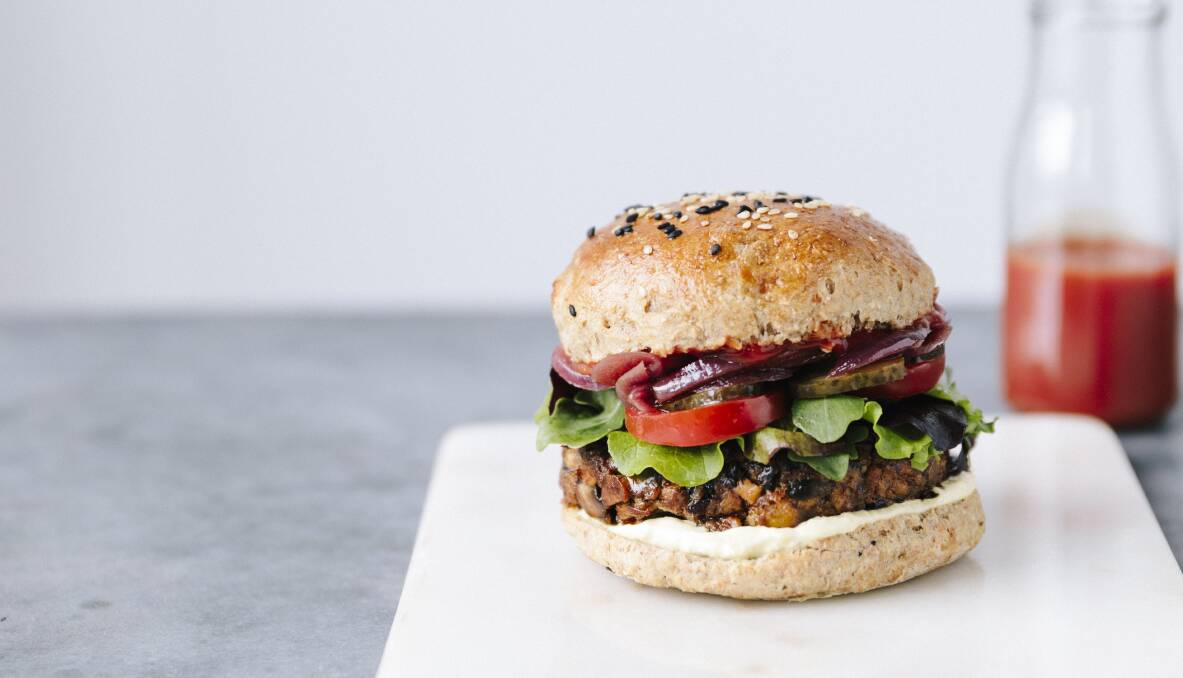
Focussing on grains and pulses as the plant-based protein source in a meal meant we hadn't used tofu in our cooking much until recently. We are aware that unless you make your own (that's dedication!) it often comes in plastic packaging. However, it is a great gateway to eating more plant-based foods, so we do make the exception and buy it for certain dishes. A lot of tofu brands have in-depth research into their carbon footprints and sourcing on their websites. Knowing this reassured us that the soya for tofu isn't usually rainforest-sourced. This burger mix is really useful and can be used for some excellent meatballs as well.
Ingredients
2 tbsp oil, plus extra for frying
1 onion, roughly chopped
3 garlic cloves, finely chopped
250g mushrooms, sliced
1 tsp mixed dried Italian herbs
1 tsp sweet smoked paprika
2 tsp miso
3-4 tsp veggie Worcestershire sauce or soy sauce
2 tbsp ground flaxseeds
1 tbsp nutritional yeast (optional)
block of firm tofu, drained and roughly chopped (350-400 g/121/2-14 oz)
chickpea flour, as needed
handful of breadcrumbs (optional, if the mixture seems wet and you have them to use)
lettuce, tomato slices, pickles, sauces and buns, to serve
Method
1. Heat the oil in a large pan over a medium heat. Fry the onion, garlic and mushrooms until most of the water has evaporated from the mushrooms and they're starting to brown. Mix in the dried herbs, paprika, miso, Worcestershire sauce or soy sauce, flaxseeds and nutritional yeast, if using.
2. Stir together for a few minutes. Add a little water if it's too dry, or add chickpea flour if it's too wet and not starting to stick together as you combine.
3. Stir in the tofu and mash together. We use a potato masher, which slices through the tofu and cooked mushrooms, combining them into a protein-full, umami texture. At this stage you can add a handful of breadcrumbs to help combine if the mixture seems wet; this is dependent on different firmness of tofu brands. Breadcrumbs also help to bulk the mixture out, and it uses up stale bread if you have it. Leave the mixture to cool for a few minutes.
4. Shape the mixture into burgers with your hands, pressing firmly together so they won't crumble when you flip them. In a large frying pan, heat a little oil over a medium heat and shallow-fry the burgers for about 10 minutes until browned and crisp all over.
5. Serve the burgers with lettuce, tomato slices, pickles and sauces of your choice in a seeded, wholemeal bun.
Note: To make meatballs instead of burgers, make the mixture, but roll into balls no bigger than golf-ball sized, so they have more surface area for crispiness. Shallow fry in hot oil in a large frying pan over a medium heat for about 10 minutes until browned and crisp all over. You may need to do this in batches, depending on pan size.
Serves 4.
Quick creamy mushroom pasta
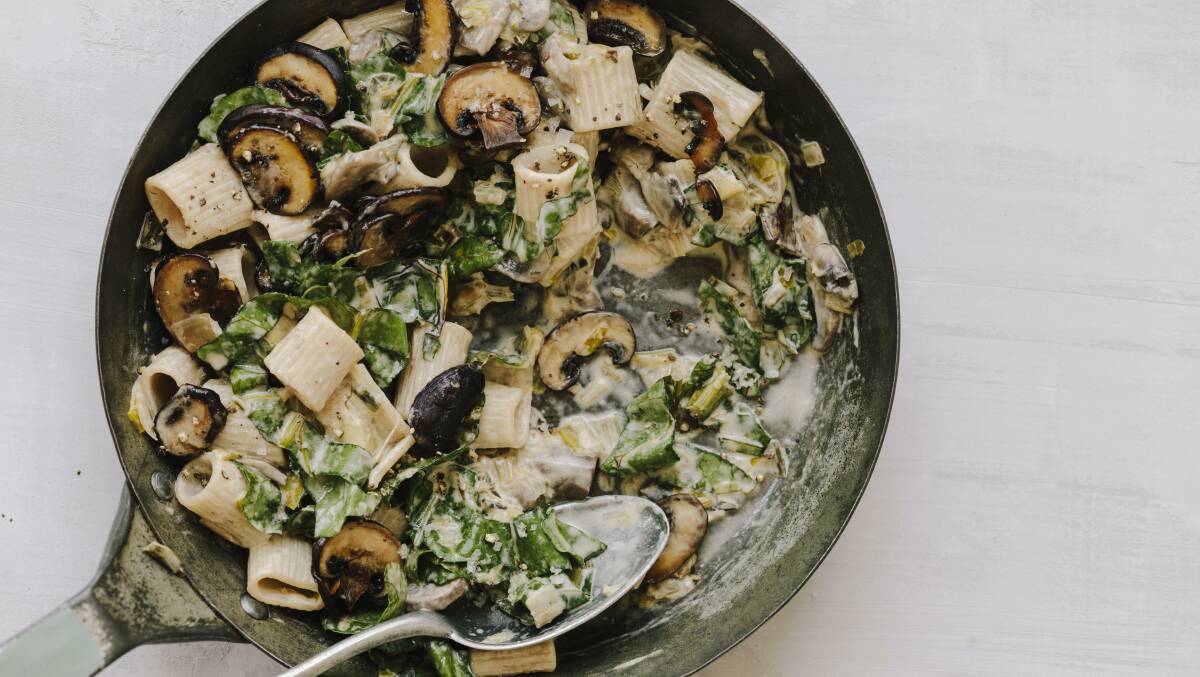
This recipe is adapted from Abi Aspen's partner Sean's staple comfort-food dish. One of the first dishes he made when he moved to Great Britain from Sweden, it's a quick and simple midweek pleasure that is so satisfying when you come home from a long day's work. The recipe lends itself well to alternative creams, so the vegan option is an easy swap.
Ingredients
3 tbsp oil
1 leek, thinly sliced with white and green parts separated
1 onion, diced
4 garlic cloves, thinly sliced
500g chestnut mushrooms
4 tbsp soy sauce
2 handfuls of greens (kale or chard work well), cut into strips
250ml oat cream (or any other cream)
100g dried wholegrain pasta (or 150g of fresh pasta)
sea salt and ground black pepper
Method
1. Heat the oil in a frying pan over a medium heat for a couple of minutes, then add the green part of the leek. Cook for five minutes until a little softened before adding the onion and white part of the leek. Cook until soft.
2. Stir in the garlic, mushrooms, one tablespoon of the soy sauce and a pinch of salt and pepper. Cover with a lid and let the mushrooms cook down over a low heat for about 10 minutes until soft. Once softened, add the rest of the soy sauce, the greens and the oat cream and stir.
3. While waiting for your mushroom mix to cook, bring a large saucepan of water to the boil and add one tablespoon salt. Add the pasta and cook for 10-12 minutes if dried or three to five minutes if fresh.
4. Drain and serve the pasta in deep bowls with the oozy mushroom mix on top.
Serves 2.


